Guitar Kit Instructions

Follow these instructions to install your Own your Tone Guitar Kit.


Guitar Kit Instructions
Follow these instructions to install your Own your Tone Guitar Kit.
You really only need three main parts to build your guitar kit: The magnets, the transformer, and the switch. Aside from that you’ll need an assortment of supplies and tools that you can scrounge up locally. Here are the parts:
Supermagnets from Gauss Boys: order quantity 50 of part number B092, which is a 9mm x 9mm x 1.5mm neodymium super magnet.
Transformer from Cine-Mag: oder quantity one of part number CM-9887 ribbon microphone output transformer.
SPDT switch from anywhere.
In addition to that you’ll need some wire, a cookie tin or other scrap metal that magnets stick to, some double-sided tape, and tools.
Also please do not forget to make a $10 (ten US dollar) payment via paypal to lester.hall@comcast.net as a thank-you for all the time and effort put into developing this kit. Your payment will help support future projects.
Parts List
Begin by removing the guitar’s strings, then remove the tuning pegs.
Use your tools to fabricate a metal strip that will electrically short the tuning pegs together. Use a cookie tin for the metal source.
Solder a wire to the shorting strip and reinstall the tuning pegs.
Remove the pick guard and drill two holes for mounting the selector switch. Install the switch into the pick guard.
Use tape to secure the wire down the neck, then run the wire into the guitar body chamber.
Leave some slack length in the wire and cut it to fit, then solder the wire to the transformer’s input signal connection.
Solder the transformer’s output connection to the other switch terminal and solder all ground leads from the transformer to star ground.
Unsolder the wire that goes to the tip connection of the jack and then solder it to the center pin of the selector switch.
Solder a wire from the potentiometer that was previously routed to the jack and solder the other end of the wire to the remaining switch terminal.
Replace the pick guard.
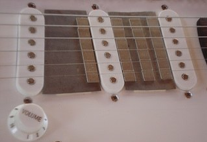
Fabricate two metal plates from the cookie tin so that they fit between your existing pickups and attach them to the pick guard between the pickups.
Place the magnets on the pick guard in rows such tat they are arranged NSNSNS underneath the strings. Add as many rows as you like. The rows should repel each other magnetically so that there is a gap between them.
Plug your guitar into amp and hear the beautiful tones that the kit has to offer.
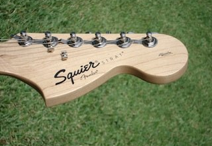
Instructions for Stratocaster Guitar